
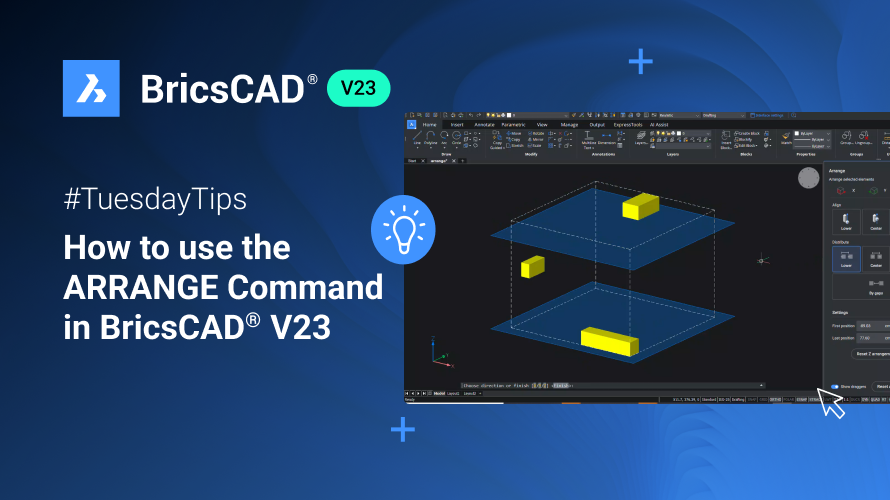
The ARRANGE command is one of the powerful tools that can help you with spatially organizing entities in BricsCAD®. This feature allows you to align or distribute a set of entities along the axis of the current UCS, streamlining your design process. Let’s dive into how to use the ARRANGE command in BricsCAD V23.
Getting Started
To access the ARRANGE command:
- Click on the tool palettes and open the improved tool palettes panel.
- Navigate to the BricsCAD tab and find the ARRANGE icon.
- Once you’ve selected the entities you want to arrange, hit enter to proceed.
Aligning entities along the X or Y-Axis
Upon launching the ARRANGE command, a new ARRANGE panel featuring various alignment options will appear. By default, the X-axis is selected, and you have three alignment choices: Lower, Center, and Upper.

Lower Align: This option aligns the entities’ lower bound with the selection set’s lower bound. The lower bound is determined by the smallest X-coordinate among the selected entities.
Center Align: Choose this option to align the center bounds of the entities with the center bounds of the selection set in the X direction.
Upper Align: The Upper Align option aligns the upper bounds of the entities with the upper bounds of the selection set along the X-axis.
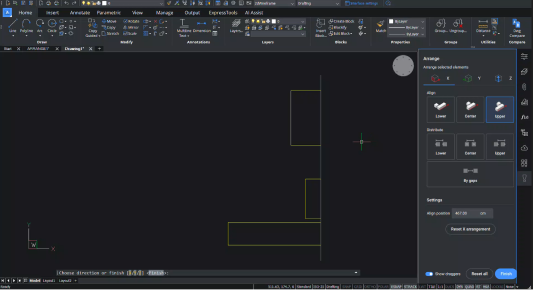
You can also use the “Reset X arrangement” function to return the entities to their original positions along the X axis.
Switch to the Y tab in the arrangement panel to align across the Y axis and follow the instructions above. If you want to restore the original positions along the Y axis, click “Reset Y arrangement.”
Distributing entities along the X or Y-Axis
In addition to alignment, the ARRANGE panel offers distribution options along the X and Y axes:
Lower Distribute: This option evenly distributes the entities, maintaining the same distance between the lower bounds of consecutive entities along the X direction.
Center Distribute: Similar to Lower Distribute, this option evenly distributes the entities but maintains the same distance between the center bounds of consecutive entities along the X axis.
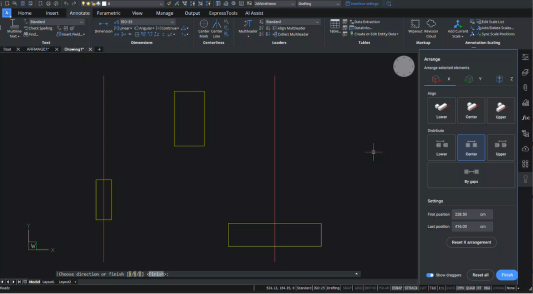
Upper Distribute: Upper Distribute evenly distributes the entities, maintaining the same distance between the upper bounds of consecutive entities in the X direction.
You can also use the “Reset X arrangement” to revert the entities to their original positions along the X axis.
To distribute across the Y axis, switch to the Y tab in the arrangement panel and follow the instructions above. If you want to restore the original positions along the Y axis, click “Reset Y arrangement.”
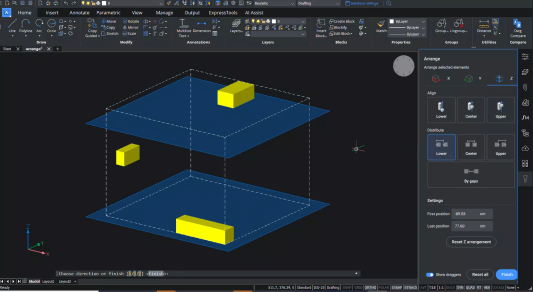
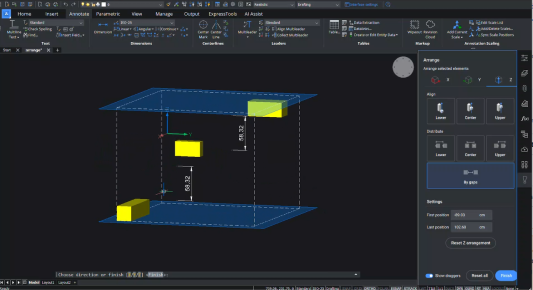
ARRANGE in 3D with the Z-Axis
The ARRANGE command also supports alignment and distribution in the Z axis for 3D entities. Select the Z axis from the ARRANGE panel and opt for Lower, Center, or Upper alignment. The same options apply for distribution, ensuring a seamless workflow in 3D space.
Fine-Tuning with Gaps
You can use the “By gaps” option to achieve even greater precision in your arrangement. This function allows you to set specific gaps between the entities along the selected axis. Based on your requirements, the gaps can be identical between consecutive entities in the X, Y, or Z direction.
Customized Positioning
In addition to alignment and distribution, the ARRANGE command enables custom positioning using “First position” and “Last position.” The first position defines the distance between the lower bound of the first entity and the origin. In contrast, the Last position sets the distance between the upper bound of the last entity and the origin along the specified axis direction.
Reset and Redo
The ARRANGE command allows you to perform multiple operations on the original set of entities within a single run. However, if you need to start over or undo the arrangement, the “Reset all” option returns all entities to their initial positions.